
Volunteers Maintaining the Largest Public Dahlia Display Garden on the East Coast | Based at the Bayard Cutting Arboretum in Great River, NY
- Home
- What is a Dahlia?
- About the Long Island Dahlia Society
- Planning Your Garden Visit
- Planting, Digging, and Over Wintering Dahlias
- The American Dahlia Society's National Shows
- Weekly Meetings
- Newsletter Archive
- 2025 Dahlia Show and Competition
- Dahlia Photo Tips
- Membership
- Executive Board
- Links/Resources
- Contact Us

Receive notifications of upcoming events, alerts, schedule change notices and other news!
Join the Long Island Dahlia Society
![]()
Having trouble reading PDFs?

Dahlia Photo Tips
How to Take Great Dahlia Photos
by Dee Cunningham
The dahlias are beginning to bloom and that means many opportunities to take beautiful photographs to enter into our Photo Show this September!! The brochure and registration form are available for download our website. We look forward to your interpretations of the dahlia, so get your cameras ready! You don’t need a fancy camera and expensive equipment. Often, Point and Shoot cameras produce fantastic photos.
The following are some basic tips to taking pictures:
- Know your camera and how it responds to different weather conditions, such as sun, shade, overcast, misty rain, time of day. Reading the manual often helps.
- Make sure your lens is clean. Spots or dust on the lens can effect the quality of your photo.
- See where the light is coming from. Keep the sun to the side of you and check in your lens to see if shadows are on your bloom.
- If taking pictures in a garden with poles, avoid including the pole in your photo.
- Best time of the day to take pictures is usually early morning or early dusk, but take advantage of anytime of the day you see a great photo opportunity.
- Notice the background of your subject. Too much going on behind your dahlia can distract from your photo. Fill the frame with your bloom.
- Shoot many, many pictures. Then you can choose the best one but take your time. Also, the more pictures you take, the better you will get.
- Keep a camera with you whenever you know you will be seeing dahlias. You won’t miss some great blooms this way!
- Instead of shooting a photo standing up, change your position to a crouch or even lie down to get a different perspective.
- Keep your elbows at your side to get a more stable photo.
How I Did It: Knowing When Not to Hold the Camera So Steady
by Ralph C. Raiola
One of the first tenets of photography is to make sure you hold the
camera steady. Like every good rule, once you know it, you can start
experimenting by breaking it. Keeping the camera steady during exposure is
no exception.
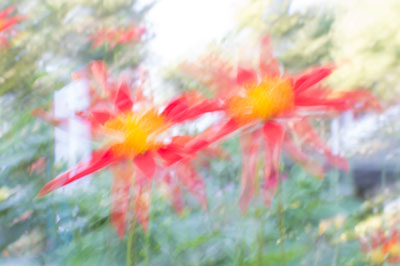
To create Dali/Dahlia, I employed what is called Motion Blur. It’s basically
entails moving the camera during a longer exposure (a second or more
depending upon the light conditions). For this image, I moved the camera
slightly up and down, to create a streaky as if a watercolor was left in a
rainstorm. You can move the camera in all different ways to see what
happens.
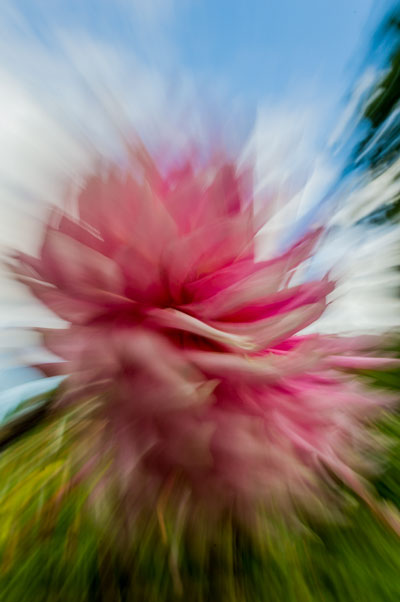
In the other image, called Motion in Pink, I used Zoom Burst. You need a zoom lens for this, manual zoom mode, and again, a longer exposure. The lens doesn’t have to be a long tele or anything, just something you can manually move in and out. It really creates a feel of motion and with vivid colors, you’re sure to get some great results.
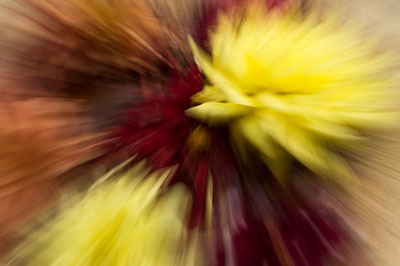
Now, while I did create these in a handheld environment, you’re still
better off using a tripod. You get better control over the movement,
especially in the case of Motion Blur. Zoom Burst often feels better
handheld.
I appreciate the Long Island Dahlia Society giving me the opportunity to
tell you about how I created these images. Now go out and try it for
yourself. It’s addictive.
Tips from LIDS Member Paul Pecora
 My favorite flower is the dahlia, here are some tips that I have learned and use in my own personal photography. I currently use a Nikon d3200 w/ Nikkor 18-140mm lens.
- Use a macro lens, and find out the closest you can get with the lens. It’s right there on the barrel of the lens, usually in meters.
- Tripod. A sturdy one, the heavier the better. Monopod ? If you like. I don’t because they (you) move. The tripod also helps with fatigue and cramps. I have a Bogen 3046, aluminum tripod, which weighs about eight pounds. It’s over 30 years old. Also, use a cable release or remote release.
- Telephoto lenses give you great bokeh (bow-kay), aka, depth of field. Use a wide aperture (f/1.8, f/2, f/2.8, f/3.5) for the best depth of field. Go out and experiment!
- Try to use manual focus. If using auto focus, pre-set it to close up.
- ISO 100-200 will give you the best photos with clarity, great color, focus etc. Shoot away ! I set my Nikon to 4 frames a sec. and it’s not unusual to get 16-20 shots off. I read in Scott Kolby’s book “Digital Photography, Vol. 1.” to turn OFF the VR (vibration reduction). His reason is that the camera is always LOOKING for vibration, and will sometimes create it. Besides, if you use a tripod, you can turn it off.